Showing posts with label shirt. Show all posts

Friday, August 3, 2012

40 Week Projects

Have you ever been 40 weeks pregnant and STILL waiting for baby to show up? Well, I am. It stinks.
I have been doing projects like crazy to keep my mind off of, well everything. Yes, I hurt and am very uncomfortable, but these are great distractions to keep my mind busy. 
First I made these cute Big Brother and Big Sister t-shirts.
They match baby brothers' new outfit. So cute!
The project was anything but easy, however. I decided to cut the fabric with my Silhouette and I just upgraded my software to the Designer Edition which should let me cut fabric no problem. Well, yes problem. It just wouldn't. So, I had to fudge it anyway. Grr. I ironed them on and hand stitched around them. Cute dinosaurs, check. Then, I bought some heat transfer vinyl which I heard worked great and you could still dry your clothes without it coming off. Well, It was a HUGE pain too! I only had one piece of black and I used almost the whole thing because it kept messing up. It is supposed to cut right on the plastic backing, but it wouldn't stay in place and kept wrinkling and completely missing part of the letters. Like I said, I used almost the entire piece of black just getting those words cut right. I finally ended up putting tiny pieces onto my cutting mat and cutting individual letters out to put together the words. UGH! Then, I had to iron them on. The first one did okay, only a few spots were stubborn to stick down. The second one did not work. In fact the plastic melted and put brown burn marks on the shirt! The white one too. Yea, oh my heck! Well, I tried re-ironing it over and over and it just did not want to stick down. I finally gave up and put some fabric glue under the edges that were still not stuck down. I figure I won't touch them until I get the super cute sibling picture and then they can fall apart in the wash. 
Seriously, I have 4 more sheets of that heat transfer stuff and I don't know if I want to touch it again. What a pain.
 Next up, Crazy Cars Quilt.
(actually it is emergency vehicles, but that just doesn't sound right)
 Remember this project? I thought it would be pretty easy to piece together and quilt. 
 All ready to sew together.
 And Done!
 In reality another huge pain. It sat on my project table for a week or more because I was so frustrated with the problems. I didn't realize that the back blanket was so stretchy. I made it through quilting without too much cursing. Then, I realized that it wasn't long enough to just fold over to bind it. So, I used the very ends of my fabrics to make the back a little longer, but first I cut it off. WHY?!! I don't know. I guess that just happens when you work on stuff with very little sleep. I had to finish the edges because this stuff sheds and frays like crazy. Then, I zig-zagged the cut off pieces back on. I folded over and finished the sides first and then worked on the special top and bottom. Apparently, I didn't make it long enough either. Bleh! So, the two end corners I just zig-zagged closed and called it good. It is a super soft and comfy blanket. Rome has adopted it, like I knew he would. And he doesn't care, so I won't either. Sigh...
 See, special. 
Did I mention that I didn't make any of the seams match? Well, I didn't. I just didn't want to work that hard. Bet you can't tell from far away.
Lastly, Whimzie Quilt Kit.
 Super cute colors and patterns. I bought it to use for other things and discovers that was not really an option. Lucky I know a few ladies having babies who might like a cute baby quilt.
All Done! (quick huh?)
The back.
 The quilting looks so cool on the back!
Okay, for the story. This quilt kit stunk! The first step was to cut off 7 inches from the center panel. Um...what? The finished quilt was supposed to be smaller than the printed panel they gave you. Really. DUMB. So, I had to figure it out on my own. I did make it to look like the picture they give you, but there was no extra for the name. I found that pink fabric out of my stash. I only had enough fabric to make 3 colorful strips, I cut one in half and sewed it to the top and bottom. Which worked out well, because the backing wasn't long enough. I used the ends of the fabric to add an extra 2 inches so it just barely fit. Also, since everything was pre-cut you couldn't pre-wash any of it. I am a little worried that it will shrink funny, but what could I do? I really like what I came up with to quilt it. I sewed around the name panel and the tree and then put a grid on the white background. I think it looks so adorable! I made sure not to have any quilted seams meet, that way there is less that could pucker. It worked out pretty darn good. (No thanks to their stinky directions.)

Well, don't know what I will work on next. Baby is Due today and Nothing is happening. I am scheduled to be induced in 5 days. Oh, that is a long time to be 40 weeks pregnant...

Wednesday, June 13, 2012

T-Shirt Printing


My Big Boy had his first Friend Birthday Party to go to. It was a Transformers Party and I wanted something the Birthday Boy would like. I didn't want to go shopping so thought I would whip out a themed t-shirt. I just bought some fabric paint and thought I would go that way. BUT, I am horrible with paint or stencils. We just don't get along. I could not get the picture I found to go into my cutting software to cut it out pretty either. I don't hand cut out. Sorry.
The picture I started out with
So, then I thought I would try just printing the picture right on the fabric. I have seen that somewhere on Pinterest. Now, I didn't go look it up or anything. I just tried it out.
I got my picture all ready to print.
 I cut fabric to page size, ironed on some interfacing, stuck it in the printer, hit "print" and watched anxiously. I was pleasantly surprised when it came out fine. I printed it in red as that is the Autobot color and this particular 5 yr-old is a Transformer expert.
Originally printed in red
I iron set it and thought I should wash it too just in case the ink didn't stay.
All washed out
Well, it didn't. The red washed right out. It left a little black and some yellowish. Boo.
So, I tried again. I stuck it back in the printer (I iron dried it first) and printed all black. It printed a little off from the first image, but I thought it looked kinda cool. Like vintage. I totally meant to do that...
Re-printed in black
Ironed and sewn on

I ironed and washed it again and it stayed. I then pulled off the backing, ironed it to the t-shirt. I thought it looked pretty good. I sewed around the edge just to keep it in place. I never fully trust interfacing to keep stuff on. That stuff pulls right off. I also stuck it in the washing machine, just to be extra sure.
That's it. Cool, vintage-y Transformers T-shirt.
Close up, you can hardly tell

Friday, April 20, 2012

Crafty Day

First up. I have had these around for a long time. Like 3 years. I always meant to hang them up in the cute nursery, but it never happened. Well, Baby Girl likes to play with them sometimes and it drives me nuts. So, finally I decided to make it happen! I was feeling crafty (and she found them again), so I got the kids and knocked it out.
A glue gun and some ribbon is all it takes.
I ran out of ribbon, so the ladybugs are kinda short. Oh well.


All hung up. Looks just how I imagined. Yay!
Secondly, I decided to make cookies with the kids. I looked up egg-free cookie recipes and stumbled on this blog post about making cookies in a bag. Cool, we can do that. I put the ingredients in the bag, with some help of course, and let them squish away.
Looks like fun right? Yea, they lost interest pretty quick. It turned into a hand work out for me. So, I put it in a bowl to finish mixing and cooked them up. I let the kids taste the dough (it is egg-free so why not). Capri loved it. No surprise. Rome hated it! Actually spit it out. Funny kid, has some texture issues.
All cooked up.
Pretty tasty-tasty. I think Rome didn't like the gooey center of his cookie, so he crumbled it and ate only the outside. Fine with me, I can finish that for you buddy! The rest of the cookies were eaten by Mom and Dad anyway. Daddy loves chocolate chip cookies, and I just don't give my kids sweets that often. Especially when they don't finish their dinner, which is often.
And what is crafty day with out a little Batman action?
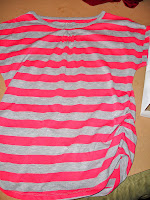
Next up is this shirt I got at the Dollar store. I know, great place to find cheap clothes. It is super big and I thought it would be great for my coming summer huge-ness.
First, I put some ruching elastic down the sides.
Then I gathered a section at the neckline and sewed it about 2 inches smaller. It was just a little too wide at the top.
Then, try it on. Looks okay now, but I bet by July it will be so comfy!
Last, this super cute looking maternity-already dress.
I have had this dress for a while. My sister actually got it for me when I was expecting baby #2. Yea, so, 2 1/2 years ago? I never wore it. It looks comfy and cute, but just doesn't have enough room for my chest, so it looks funny. I figured I have been doing this altering stuff, I could fix it no problem. Just put a black sash around the middle. I got out my seam ripper and before you know it, had a huge hole in the front of my dress. All ready to...do what? Just putting a sash isn't going to give me more room for my bust. It would just cause the same problem I had before. A huge seam across them middle of my (ever larger) bosom. I just can't handle that. It looks weird. Well, this one might take a bit longer than anticipated. I will have to think about it some more.
On the plus side, I got all of this stuff done while my kids were awake! And finished four projects in one day. Amazing!

Monday, April 16, 2012

Modify

I have been working on lots of projects lately. Quiet books (not finished), summer maternity shirts, maternity dresses, super capes to give away (not even started), finally hemming 3 or 4 pairs of pants. Yea, keeping busy. My current obsession is to alter clothes to fit my belly and be more modest.
First up, some t-shirt I found at Old Navy on clearance. I thought they would be perfect with some elastic on the side seam.
I measured one of my favorite Motherhood Maternity shirts and tried it out a couple of ways.
I think it turned out pretty good.
Except I wanted to put some ruching on the sleeves too, to make them shorter and cuter. That didn't work so well and isn't finished yet. I better hurry though, they might not fit soon. This belly just keeps growing on me.
Next up is this halter maxi dress I bought for $10. It is supposed to be a maternity dress, but it fit a little funny. I was going to just cut off the back twisty part that was too tight, but then I started thinking. It was way too long. So...
I started by cutting 12" off the bottom.
Then I cut one halter front off to switch it to the other side that I liked the pattern better. I unpicked the elastic out of the waist. Sewed on a back panel. Looked up how to make a sleeve pattern and cut out a mock up out of black fabric. Sewed, unpicked and modified the sleeve, sewed, unpicked, gathered, and re-sewed the sleeves back on. It didn't really have a sleeve opening, so it was a bit harder than I anticipated. It took a while, but I figured it out.
The last thing to do was to put in a modesty panel so I could wear it without a tank underneath.(oh, and sew the waist elastic back in) I first followed the shape of the front to make the panel, because one side is wider than the other. (because I flipped it over) However, it was too wide and I had to wear a tank underneath anyway. (I wore it for Easter) I fixed it later and it looks great!
Hubby says it isn't very flattering, but it is a maternity dress. They aren't really made to be flattering. It is however very comfortable and light enough to wear all summer. Yay!
Almost last project, this dress I got in Europe in high school.
Yes, its that old. I still love it though. I have had it on my project list for a while because the back slit is just a little too high now a days. So, I put in a little modesty kick panel.
I did this after the much harder Easter dress and thought, "Hey, I can put sleeves on this one no problem." Actually, I even used the sleeve mock ups that I cut out for that dress. Since they were regular sleeves and in the fabric that was the same black polyester stuff this dress is.
I think it turned out pretty good too. I hope it fits later when I can actually fit into it.
Now onto the last maternity shirt to be ruched and finish the sleeves on the almost finished ones. Almost done, right? Never...