Friday, August 3, 2012

40 Week Projects

Have you ever been 40 weeks pregnant and STILL waiting for baby to show up? Well, I am. It stinks.
I have been doing projects like crazy to keep my mind off of, well everything. Yes, I hurt and am very uncomfortable, but these are great distractions to keep my mind busy. 
First I made these cute Big Brother and Big Sister t-shirts.
They match baby brothers' new outfit. So cute!
The project was anything but easy, however. I decided to cut the fabric with my Silhouette and I just upgraded my software to the Designer Edition which should let me cut fabric no problem. Well, yes problem. It just wouldn't. So, I had to fudge it anyway. Grr. I ironed them on and hand stitched around them. Cute dinosaurs, check. Then, I bought some heat transfer vinyl which I heard worked great and you could still dry your clothes without it coming off. Well, It was a HUGE pain too! I only had one piece of black and I used almost the whole thing because it kept messing up. It is supposed to cut right on the plastic backing, but it wouldn't stay in place and kept wrinkling and completely missing part of the letters. Like I said, I used almost the entire piece of black just getting those words cut right. I finally ended up putting tiny pieces onto my cutting mat and cutting individual letters out to put together the words. UGH! Then, I had to iron them on. The first one did okay, only a few spots were stubborn to stick down. The second one did not work. In fact the plastic melted and put brown burn marks on the shirt! The white one too. Yea, oh my heck! Well, I tried re-ironing it over and over and it just did not want to stick down. I finally gave up and put some fabric glue under the edges that were still not stuck down. I figure I won't touch them until I get the super cute sibling picture and then they can fall apart in the wash. 
Seriously, I have 4 more sheets of that heat transfer stuff and I don't know if I want to touch it again. What a pain.
 Next up, Crazy Cars Quilt.
(actually it is emergency vehicles, but that just doesn't sound right)
 Remember this project? I thought it would be pretty easy to piece together and quilt. 
 All ready to sew together.
 And Done!
 In reality another huge pain. It sat on my project table for a week or more because I was so frustrated with the problems. I didn't realize that the back blanket was so stretchy. I made it through quilting without too much cursing. Then, I realized that it wasn't long enough to just fold over to bind it. So, I used the very ends of my fabrics to make the back a little longer, but first I cut it off. WHY?!! I don't know. I guess that just happens when you work on stuff with very little sleep. I had to finish the edges because this stuff sheds and frays like crazy. Then, I zig-zagged the cut off pieces back on. I folded over and finished the sides first and then worked on the special top and bottom. Apparently, I didn't make it long enough either. Bleh! So, the two end corners I just zig-zagged closed and called it good. It is a super soft and comfy blanket. Rome has adopted it, like I knew he would. And he doesn't care, so I won't either. Sigh...
 See, special. 
Did I mention that I didn't make any of the seams match? Well, I didn't. I just didn't want to work that hard. Bet you can't tell from far away.
Lastly, Whimzie Quilt Kit.
 Super cute colors and patterns. I bought it to use for other things and discovers that was not really an option. Lucky I know a few ladies having babies who might like a cute baby quilt.
All Done! (quick huh?)
The back.
 The quilting looks so cool on the back!
Okay, for the story. This quilt kit stunk! The first step was to cut off 7 inches from the center panel. Um...what? The finished quilt was supposed to be smaller than the printed panel they gave you. Really. DUMB. So, I had to figure it out on my own. I did make it to look like the picture they give you, but there was no extra for the name. I found that pink fabric out of my stash. I only had enough fabric to make 3 colorful strips, I cut one in half and sewed it to the top and bottom. Which worked out well, because the backing wasn't long enough. I used the ends of the fabric to add an extra 2 inches so it just barely fit. Also, since everything was pre-cut you couldn't pre-wash any of it. I am a little worried that it will shrink funny, but what could I do? I really like what I came up with to quilt it. I sewed around the name panel and the tree and then put a grid on the white background. I think it looks so adorable! I made sure not to have any quilted seams meet, that way there is less that could pucker. It worked out pretty darn good. (No thanks to their stinky directions.)

Well, don't know what I will work on next. Baby is Due today and Nothing is happening. I am scheduled to be induced in 5 days. Oh, that is a long time to be 40 weeks pregnant...

Sunday, July 22, 2012

Foodie

Okay, I am not really a Foodie, but I do Love chocolate and trying out new recipes. Pinterest is really great for both. This first one, I just made up. I do that a lot too.
I got these for cheap. Tasty, but boring.
 So, why not add something special?
 Homemade Croissant au chocolate. yummmm!
 This one was from Pinterest. 
I made it for a ward activity. I used half the amount of strawberries and added some blueberries instead. Its what I had. It was So Delicious! I was actually happy to bring some home. The lemon icing on top was the best part! 
(I am not a big fan of lemon either. Pure Chocoholic here.)
Next up, Pinterest fans... Avalanche Bars
Oh, these were goooood. I don't really like white chocolate, so I have been waiting a while to make these for my hubby. But, I needed something quick to give away, so thought I would try it. Quick, easy, good. I even added some m+m's for good measure. 
Oh, I was wrong! They are to die for!
 So good that I couldn't stop snitching from the pan, forget about letting them cool.
I had to add chocolate on top or I seriously would have kept eating. (and made myself sick) This way I had to leave them alone until the chocolate set.
Really, you must try these. 
Just be careful. 
You might eat the whole pan.

Decor Ideas

A while ago my jewelry board fell down. It held all of my necklaces and bracelets. I was very upset about it.
 It was just jammed in between the shelves in my closet, but I was unhappy. Mostly because I found out about the fall by seeing my kids trailing my jewelry around the house. I pretty much went ballistic. Most of it was okay. Some got scratched and bent. I definitely needed a new system. I saw this idea of using an old rake a couple of times on the internet and Pinterest, but sort of ignored it. Then, I caved and got the old, broken rake out of my garage, washed it off and hung it up with a few screws. 
 It is not really my style, but seriously beats the mess they were before. I can actually find what I want!
 This is the shelf were they were in piles. It was scary and really sad. I think I stopped wearing any jewelry (I hardly wear it anyway) because it was so bad. Now, it is just my bracelets and looks pretty good.
As a side note, I finally figured out what to do with this little wall in between my windows in my bedroom. I have all of these pretty little things, but they are stuffed into a little shelf with books. So, I put up three shelves and wah-la! Pretty stuff has a place. Okay, they really need some styling help, but I am happy to have them up and have a place for my pretty little things to go. Someday my brain will work again and I can re-arrange them to look nice.

Saturday, July 7, 2012

Zig Zag Quilt Along

Remember this?

Well it turned into this...
Thanks to this
Pretty great huh? I had a hard time deciding what fabrics to put next to each other, but I really like how it turned out. I actually brought it up to Utah to show my Grandma (who quilts like mad, and who taught me how to sew). She like it and suggested that I do a vine like border. While I don't exactly know what she meant, I liked the idea. I searched the internets and found this
that does a border just how I want. I will have to figure out my measurements and do it quick! I am definitely feeling ready for this little guy to show up and I don't know how many projects I will be able to finish before my time is consumed with baby and not sleeping. Hopefully this is one of them!

Saturday, June 23, 2012

Gifted

I have been thinking about this gift ever since I found out that my Sister-in-law was pregnant and due the same time as me. Of course she is having a girl and I get another little boy. I wanted to try a cheater quilt, but could not find a down (or fake down) throw anywhere. Even online, it is just the wrong season, I guess. I finally found ONE at Tuesday Morning in zebra print. I figured I could add some pink and it would be okay for a little girl. I found a great charm pack in pinks, grays and yellows with gold accents even. Perfect! I don't know if my SIL likes zebra print, but she definitely has attitude and loves bling, so this might work for her. I just hope she doesn't hate it.

 My (fake) down comforter and fabric squares.
 All glued and ready to sew.
 Done! It was that quick. I really like how it turned out too.
 I chose to zig-zag the squares, in bright pink of course.
 Close up of the back. Looks pretty great to me.
I tied it up and added a cute bib and outfit. I also made the tutu to match the cute onesie. Another little talent that doesn't take very much time. I think it makes a great set. I hope my SIL loves it too!

Sunday, June 17, 2012

Works In Progress

Okay, I only have a few projects that are actually started. Like 3.  I have a lot more that are bought and sitting around, ready to be figured out. Like 7. And I wonder how I never finish things...

First up are these Quiet Book pages. I participated in a Quiet Book exchange back in, oh, Oct? A long time ago. Anyway, after I got all my pages back, I could not think of how to finish them. The ones I made are on fabric and sewn and the others are on felt and part sewn, part hot glue. You can't sew hot glue. (I tried, don't do it.) I finally figured out what to do with them. I got a bunch of different fabrics in fun patterns. I cut them to the right size, with interfacing, and just top stitched them onto the pages. I also added a pocket on the back for all those extra pieces. I have only finished about 6 pages. So, only 10 or so more to go. I think they are pretty cute though.
My button on flowers. Capri loves this one.
Pretty birds on the back.

Next is my Quilt-along filler project. I originally got this charm pack to use as my zig zag quilt, but it didn't have enough of the colors to make the stripes and I just cannot bring myself to mix the colors. I can't do it. So, I got some other fabric for my zig zag quilt and figured out a different pattern for these beautiful fabrics. They really are so bright and fun! This project is going to keep me busy while waiting for the next steps on the quilt-along. 
I am calling this one my Colorful Windows Quilt. 
I came up with the pattern myself. I really like it.

These are the fabrics I found for the zig zag quilt. Kind of cute baby girl-ish, but I like them. I have a nice cream, plushy blanket to use for the back too.

Not sure what pattern I will use for these, but I really liked this yellow and gray jelly roll. I have so many options with 8 different fabrics to play with and I already have a gray fleece blanket for the back.

These were a bunch of fabric remnants that I picked up while looking for something else. I thought they looked so nice together that I had to do something with them. I don't know what yet, but I won't need any extra sashing fabric because they are all almost a yard, except for the two solid colors. I still need to find something for the back though. I am not quite sure what would fit. Maybe another cream fleece blanket. Hmmm.

This is a left over piece from some pajamas I made. I just zig-zagged the edge and let the kids play with it like a blanket. I figured I could easily add some other fabric and actually make it into a nice blanket.
Maybe with this plushy blanket as backing?

These fabrics I found as remnants also, but I was looking for them. I found this 2 yd piece of fleece fabric at Tuesday Morning for $5 and wanted something to go with it. Not sure how it will turn out yet. Some of them are a yard or more and some are barely 1/4. I will just have to make it work.

I decided to wash all my fabric together and ended up with 4 different colored loads. Lots of fabric just ready to be cut up and made into something gorgeous! Got to keep busy...


Thursday, June 14, 2012

Today's Finds

I just HAD to post this. Even though posting something the same day it happens is unheard of. I am just so excited about it!
 I have wanted to look at the thrift store for a while now. We had some extra time before a play date, so I thought today would be a good day. The kids took extra long getting ready and getting in the car so we only had 45 mins. or so before we were supposed to meet someone. I was a bit hesitant to attempt the thrift store on so little time. Searching for good stuff takes some time you know, but we did great! I found some good stuff for way cheap and we left at just the right time. I was hoping to find some more maternity shirts, but didn't feel like looking through all the clothes to find ones that would work. Oh well. My wardrobe just keeps getting smaller...only a few more weeks anyway.

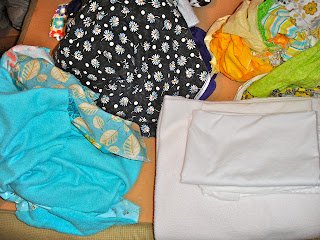
Here is what I found. One purple/gray queen size duvet cover (Don't know what I am doing with this yet, but twice the fabric to use!) $4, one queen size rainbow stripe sheet set (Awesome backing for my rainbow quilts coming up!) $4, one blue twin size sheet set (Actually a Disney set. I was thinking of backing a quilt with it, it is such a pretty color, but I might hold off for a bit because they are such good quality sheets!) $4, one twin size fitted sheet (just the right colors for the colorful windows quilt I am working on now. Yay!) $2, one Pyrex drink pitcher (I lost my last one and I miss it) $1, 2 glass canisters with lids (For my "Grandpa's Stache" candy jars for Father's day) $2 each, 2 nesting frames to decorate my craft room walls $2 each, and one swirly border silver bowl (I just can't resist those heavy duty silver platters!) $6. I got it all for $28.96! Okay, some of the items are a bit under the price I put, but you get the idea. Still, great deals all around.
Okay, so I may be obsessing a bit about my quilts, but I am so excited to find all of this fabric for so cheap! I know, crazy. I have been wondering how I was going to back some of the quilts I have plans for without buying yards of fabric at $4/yard or more. Okay, more like $8/yard at 2-3 yards per quilt. Ouch. I just don't have the cash right now to be splurging like that. So, these made me very happy today. I just love the thrift store.

Wednesday, June 13, 2012

Pirate Parrrty

I hosted a crafty Pirate Party for my Big 4 year old. Go check out my other blog to see the details. Josh and Jocie- Pirate Parrrty


T-Shirt Printing


My Big Boy had his first Friend Birthday Party to go to. It was a Transformers Party and I wanted something the Birthday Boy would like. I didn't want to go shopping so thought I would whip out a themed t-shirt. I just bought some fabric paint and thought I would go that way. BUT, I am horrible with paint or stencils. We just don't get along. I could not get the picture I found to go into my cutting software to cut it out pretty either. I don't hand cut out. Sorry.
The picture I started out with
So, then I thought I would try just printing the picture right on the fabric. I have seen that somewhere on Pinterest. Now, I didn't go look it up or anything. I just tried it out.
I got my picture all ready to print.
 I cut fabric to page size, ironed on some interfacing, stuck it in the printer, hit "print" and watched anxiously. I was pleasantly surprised when it came out fine. I printed it in red as that is the Autobot color and this particular 5 yr-old is a Transformer expert.
Originally printed in red
I iron set it and thought I should wash it too just in case the ink didn't stay.
All washed out
Well, it didn't. The red washed right out. It left a little black and some yellowish. Boo.
So, I tried again. I stuck it back in the printer (I iron dried it first) and printed all black. It printed a little off from the first image, but I thought it looked kinda cool. Like vintage. I totally meant to do that...
Re-printed in black
Ironed and sewn on

I ironed and washed it again and it stayed. I then pulled off the backing, ironed it to the t-shirt. I thought it looked pretty good. I sewed around the edge just to keep it in place. I never fully trust interfacing to keep stuff on. That stuff pulls right off. I also stuck it in the washing machine, just to be extra sure.
That's it. Cool, vintage-y Transformers T-shirt.
Close up, you can hardly tell